How to Create Your First Automated Email Funnel
Email funnel, traffic funnel, Facebooks ads funnels – If you’re not careful, you can quickly become overwhelmed when it comes to building a successful blog.
The answer?
Don’t work harder. Work smarter.
Pay attention to the habits of other professional bloggers and you’ll discover some important patterns. Successful bloggers:
- Eliminate the unnecessary
- Automate as much as possible
- Outsource everything else
Let’s focus on one easy, yet powerful way you can begin the automation process.
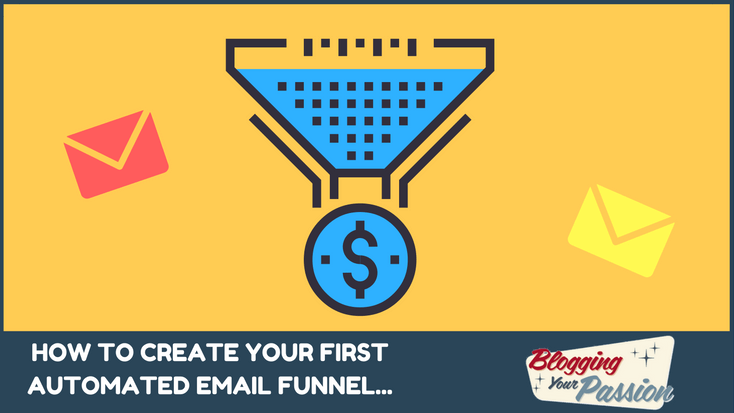
How to Create Your First Automated Email Funnel
Let’s start by discussing the types of automatic emails you can deploy. Once set up, you can send these emails to your target audience on autopilot.
- Email welcome series – This series of 3-5 emails can be sent to all new email subscribers. The purpose of this series is to deepen the relationship with your new subscribers and further establish the purpose of your blog.
- Automatic sales funnel series – This email series can be sent to people interested in your product or service. It is usually triggered by an email lead magnet. After they opt-in to get the lead magnet, they will receive a series of emails encouraging a purchase.
- New customer nurture series – I believe the job is not done once you get someone to buy your product. You now have a responsibility to get them to consume the product so they can experience a transformation. You can do this by setting up a series of emails that begin after someone purchases your product.
There are many other types of automated email funnels, but these are the basic ones you should build in your business. Let’s now set one up together as an example.
Step 1: Select the right email marketing software
While most email marketing solutions have the ability to set up automated email sequences, not all are built alike.
I personally use and recommend ConvertKit. Not only does ConvertKit have the advanced features the more expensive competitors have, but the interface is the easiest one to use.
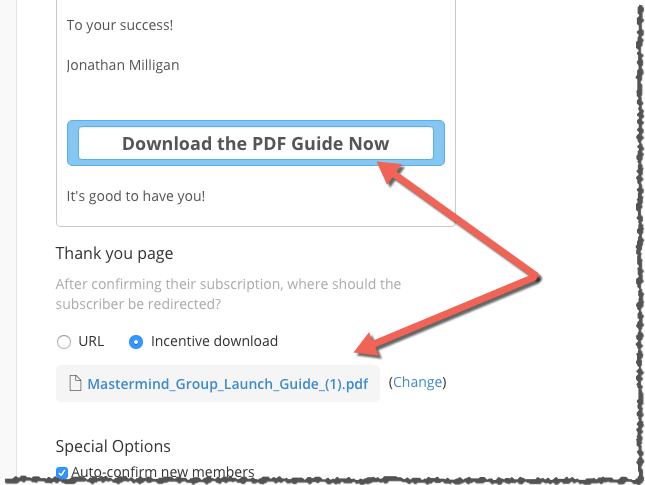
Step 2: Set up your lead magnet trigger
We will be using ConvertKit to set up our first automated funnel. While there are several ways to trigger an automated funnel to begin, the most common is after someone gives you their email address from your blog.
In ConvertKit, you’ll need to create a form and embed it on your blog to start the process. ConvertKit also makes this process simple because you can easily deliver the lead magnet they were promised when they opted-in.
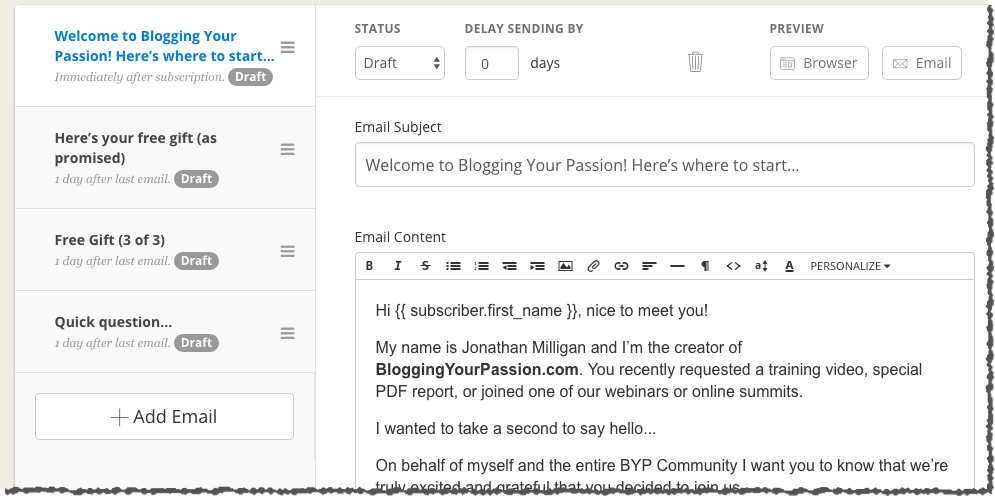
Step 3: Create a new automated email sequence
An automated email series is also referred to as an autoresponder series or email sequence. Inside ConvertKit, it’s referred to as an email sequence.
Setting up a sequence is simple. One of the reasons I love Convertkit is how quickly I can deploy a new email sequence. They even offer you a template to follow if you’re brand new at this.
- Create each email in your sequence – Craft the subject line and then fill in the body of your email. Add a call to action if your goal is to educate the reader in why they should purchase your course.
- Set the timeline for each email – In ConvertKit, you’ll want to indicate how many days from the last email should they send this email. I typically recommend sending it the next day.
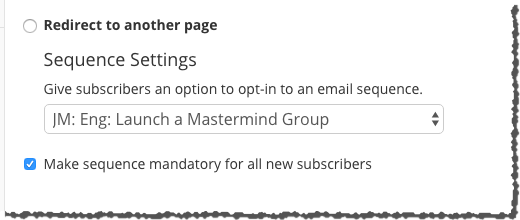
Step 4: Connect the form to the sequence
Now let’s put this all on autopilot. Go back to the original form you created. Under “settings” you will find “sequence settings.” Here you will select the sequence you set up from the previous step.
You are all set!
Pro Tip: Check back in a few weeks and analyze your stats. Look for ways you can improve specific emails in your sequence. If one email has a much lower “open rate” than the rest, try changing the email subject line to improve your numbers.