How to Allow Your Subscribers to Opt Out Without Unsubscribing
Want to lower your unsubscribes (especially during a launch or special promotion)? Want to lessen the chance of annoying your email subscribers? I’m going to share some ConvertKit tips and tricks to help you keep people on your list.
The key is allowing them to opt out of a particular promotion without unsubscribing from your main list.
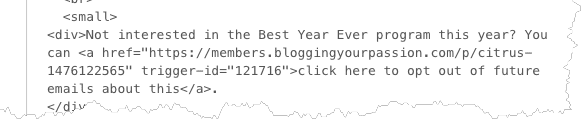
Below is an example of what my subscribers saw at the bottom of my emails while I was promoting Michael Hyatt’s Best Year Ever Course Launch.
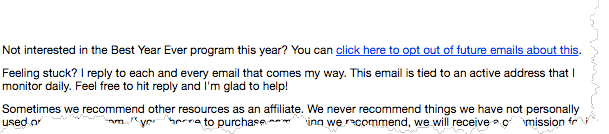
When email subscribers click on the blue link shown above, they remain on my email list, but they will no longer receive emails about that promotion.
This allows subscribers to stay in control of the marketing process. Seth Godin refers to this as “permission marketing.” Before the boom of technology, marketing was delivered primarily via “interruption marketing.” You were shown random TV commercials, radio ads, and other advertisements whether you were the ideal customer or not.
Permission-based marketing allows your ideal customers to vote with their actions. If they click to “opt out,” they won’t hear any more on that topic. However, if they engage with the emails by clicking on the desired actions (download the PDF, watch the video, etc.), they will receive more emails about that topic since they’ve demonstrated interest.
Most email marketing platforms have a way to set up this whole system. I’m a big fan of ConvertKit so the following steps will show you how I set up the entire system.
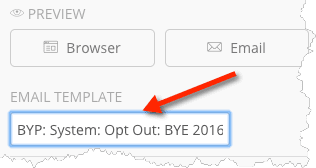
Step 1. Create an opt-out tag
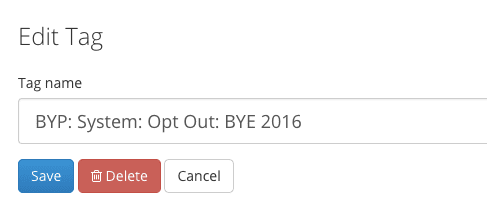
Since this whole system is based on your subscriber clicking on a link, you’ll need to set up a trigger. The way we do this with ConvertKit is to start by creating a tag. We want to tag everyone who clicks on our opt-out link so we can filter them out of future emails.
When you are under the “Subscriber” tab inside of ConvertKit, you’ll click on “create a new tag” on the bottom right-hand side of the page. I like to use a naming convention like, System: Opt Out: (Name of Promotion). The image below will show you an example.
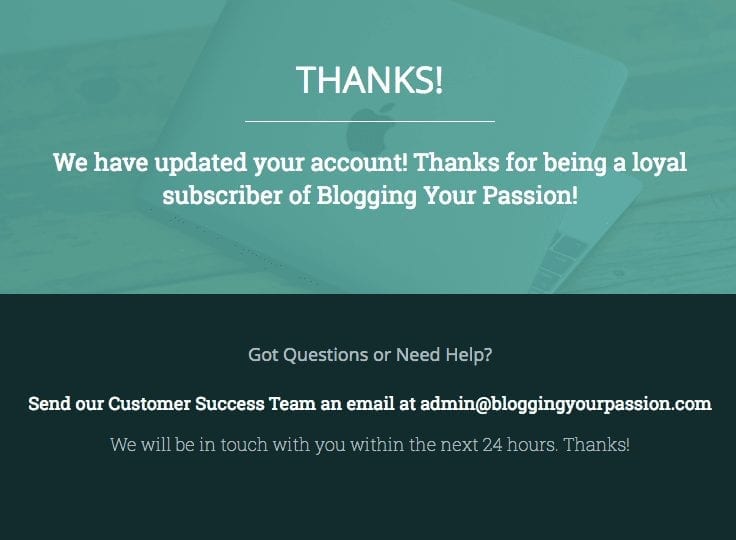
Step 2. Publish a generic thank you page
In this step, you will need to design a basic thank you page that your subscriber will go to when they click on the link mentioned above. Keep the design simple. You can use a simple WordPress page that says: “Thanks! We have updated your account! Thanks for being a loyal subscriber.” We created our page using the landing pages feature inside Kajabi.
Pro Tip: Make the page generic so you can use it across all your future promotions as well.
Step 3. Set up an automation link trigger
Now we are going to put all our automation in place. Go to the “Automation” tab inside of ConvertKit and choose “clicks a link” for the trigger. Use the same name as your tag to keep things simple in the name field. For the destination URL, copy and paste the link to the thank you page you created in the last step.
For the action section select “add tag” and then find the tag you created earlier. Now your subscriber will automatically get the opt-out tag if they click on the link we are about to set up.

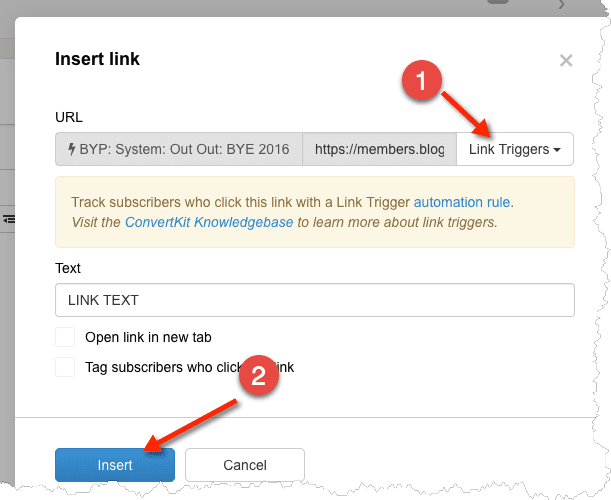
Step 4. Grab the code of the link trigger in a new email
Open up a new email broadcast and create a link in the body of the email. When the “insert link” box pops up, choose “link triggers” and find the link trigger you created earlier.
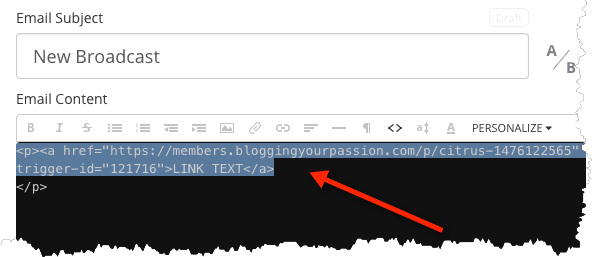
Next, click on the <> symbol to get into the code side of the email.
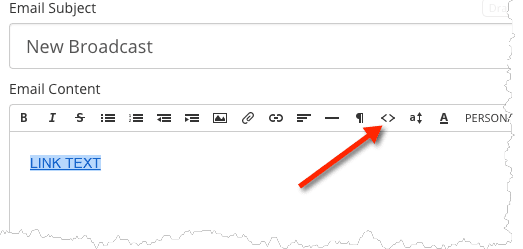
Highlight and copy the text you see in the email.
Step 5. Create a new email template
Now, we are going to insert our link into an email template so we can easily use it over and over again.
Note: If you want to keep things simple, just save the link you copied in the last step in a document on your computer. Then, before you send your email, paste in the link at the bottom.
However, if you have a longer email promotion of 5-10 or more emails, you’ll want to create an email template to save time.
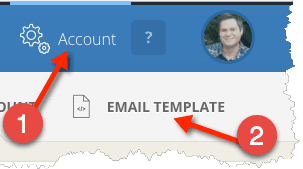
Click on the “Account” tab and then “Email Template.”
This works best if you duplicate an existing template. Paste your text at the bottom of the template and change the text to what you want to be “clickable” text. The clickable text in the image below would be “click here to opt out of future emails about this.”
Save the template and name it something that is easy to remember.
Step 6. Add the opt-out footer to your future email broadcasts on that promotion.
As you are typing up your new email broadcast, you can select the template you just created. This will add the footer text with the opt-out link to the bottom of your email. Use this template with every email you send out about that promotion.
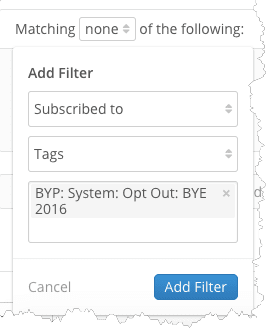
Step 7. Segment out those who opt out in future emails
After your first email that includes your opt-out link, you’ll need to exclude subscribers who have your tag to any future emails about that promotion.
The way we do this in ConvertKit is to select “Match none of the following” and select the tag we created earlier.
You are all set! Now you can email your list and allow people who are not interested to opt out of a promotion without having to unsubscribe from your list.